I just lost a game I was winning the whole time. But even so there were many opportunities to play even stronger.
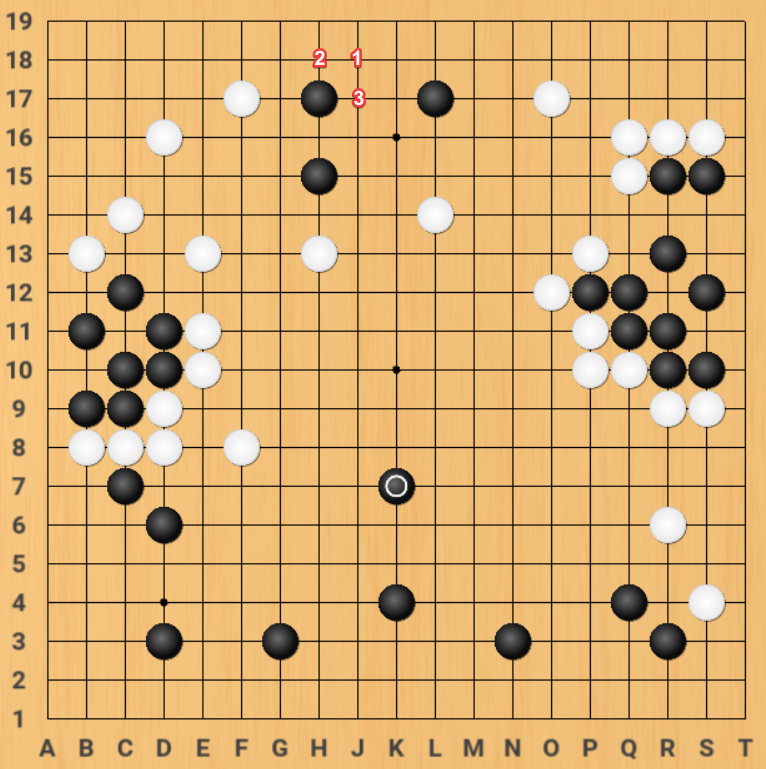
Position 1 – You need 3 corners to make that eye…

I hate how obvious these L&D problems are after the game. But suffice to say that Black must have both points 1 and 2 to make an eye.
Therefore playing at 3 threatens to run out so black must block at 4
Then playing at 1 threatens to connect with 3 and black cannot defend against both threats, thereby dying a horrible sealed-in death.
As big as that kill is, though, the main thing is to deal with the invading stone at the moment. But this post is primarily about missed L&D.
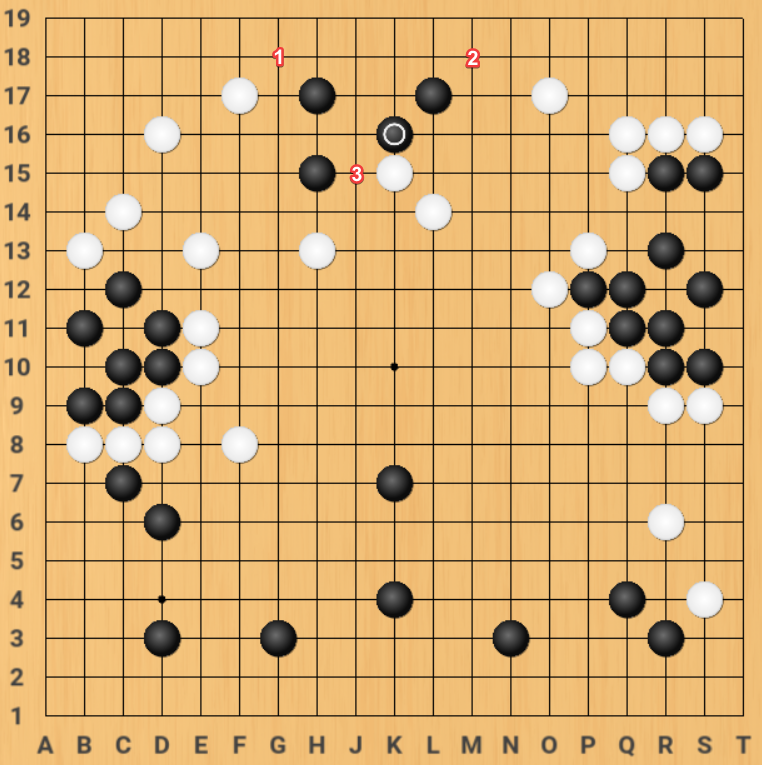
Position 2 – threatening the 2-space extension
I want to burn this image into your memory. But more importantly you should be familiar with how to attack it. I searched for “eye stealing move of the 2-space extension” and good discussions showed up on Life in 19×19 as well as Senseis.
Playing at 1 typically leads Black to block at 2 or 3 and White can escape either way.
But there are other fun attacks as well here such as K16 or J16. But the thing about attacking is you need to make sure you are ready to deal with Black when he runs for his life or starts making contact plays everywhere as he fights for life.
Position 3 – Forcing Black into a killable shape
At first glance Black looks solid up top. But after White plays 1, 2 and 3, Black looks like this:
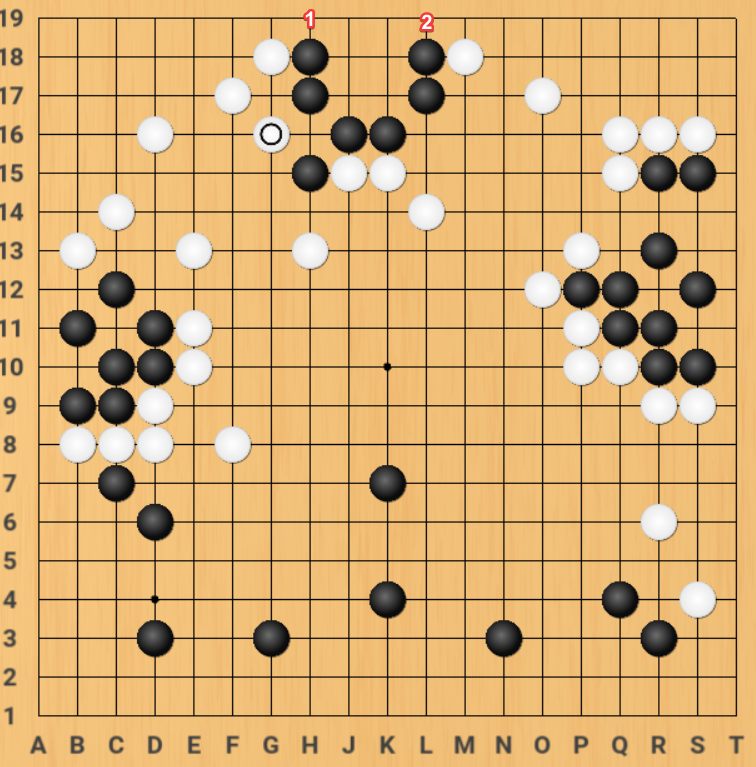
Now, Black only has 1 eye because White has “1” and 2″ to kill any eye along the side.
Final Position – I blunder away a corner fight
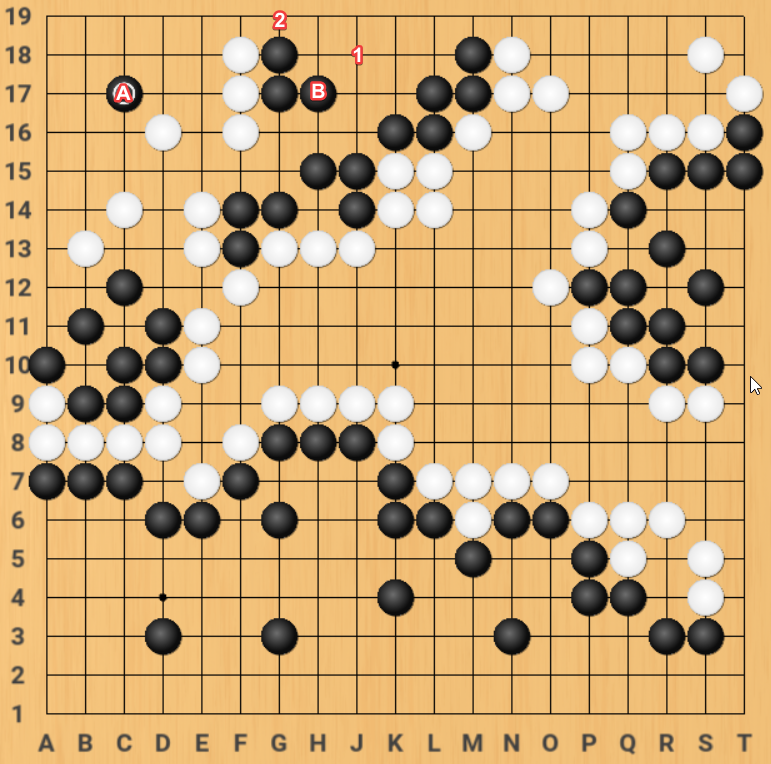
The first thing I want to say about this 3-3 invasion is
I need to quit having tunnel vision and getting obsessed with a single objective. While I’m grunting and sweating trying to kill one stone, group B is having a laughing fit because I did not see the vital point at “1” with a potential connection to 2.
But besides that: what’s wrong with just playing a normal 3-3 invasion joseki? Black will run out of room before forming 2 eyes. But I had to grit my teeth and furrow my brow and do everything in my power to squeeze black to death.

i failed many times in this un-necessary fight, but the one thing I learned was when Black forced me to connect I made a bamboo joint instead of connecting to reduce Black’s liberties. Bamboo joints are great for stability but in a capture race, the goal is reduce opponent liberties, ideally in sente.
Another learning experience in the books
I dont like losing, but man was it educational.